The second DEEP release was recently published and it comes with plenty of new useful functionalities, all of them with the common goal of easing the path for the scientific communities to develop, build and deploy complex models as a service at their local laptop, on a production server or on a cloud infrastructure. One of the main novelties is that the platform now supports asynchronous training and allow to launch, monitor, stop and delete the training directly from the web browser in a transparent way. The prediction features were already introduced and explained in detail in a previous post. Now is the turn for a walk through the training functionalities of the DEEP platform and the recent additions to improve the user interactivity.
To make things easy, we have developed a platform allowing the user to interact with the model directly from the web browser. Let’s see how all this work!
In this post we will show how to train a model using the training dashboard. All the modules included in the marketplace are available from the dashboard. Let’s take as an example the image classifier. We are going to perform a new training to distinguisth between pictures of roses and daisies.
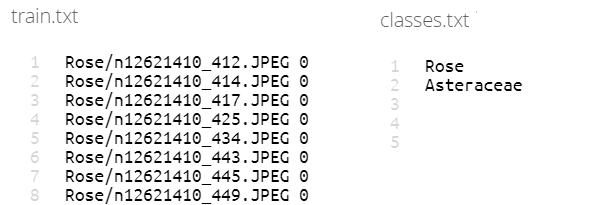
The data must first be uploaded to the storage system of your choice. For this example we will be using NextCloud, where we need to create a folder called dataset_files that must include two text files:
- train.txt: containing the paths within NextCloud to the images to be used for the training followed by a number indicating the category of each image (0 or 1 in this case, since this is a binary classification)
- classes.txt: containing the name of the different classes. In this case rose and asteraceae (the scientific name of the daisies).
Once we have our training data in place, we open the dashboard and browse the different models till we find the one titled “Train an image classifier”.

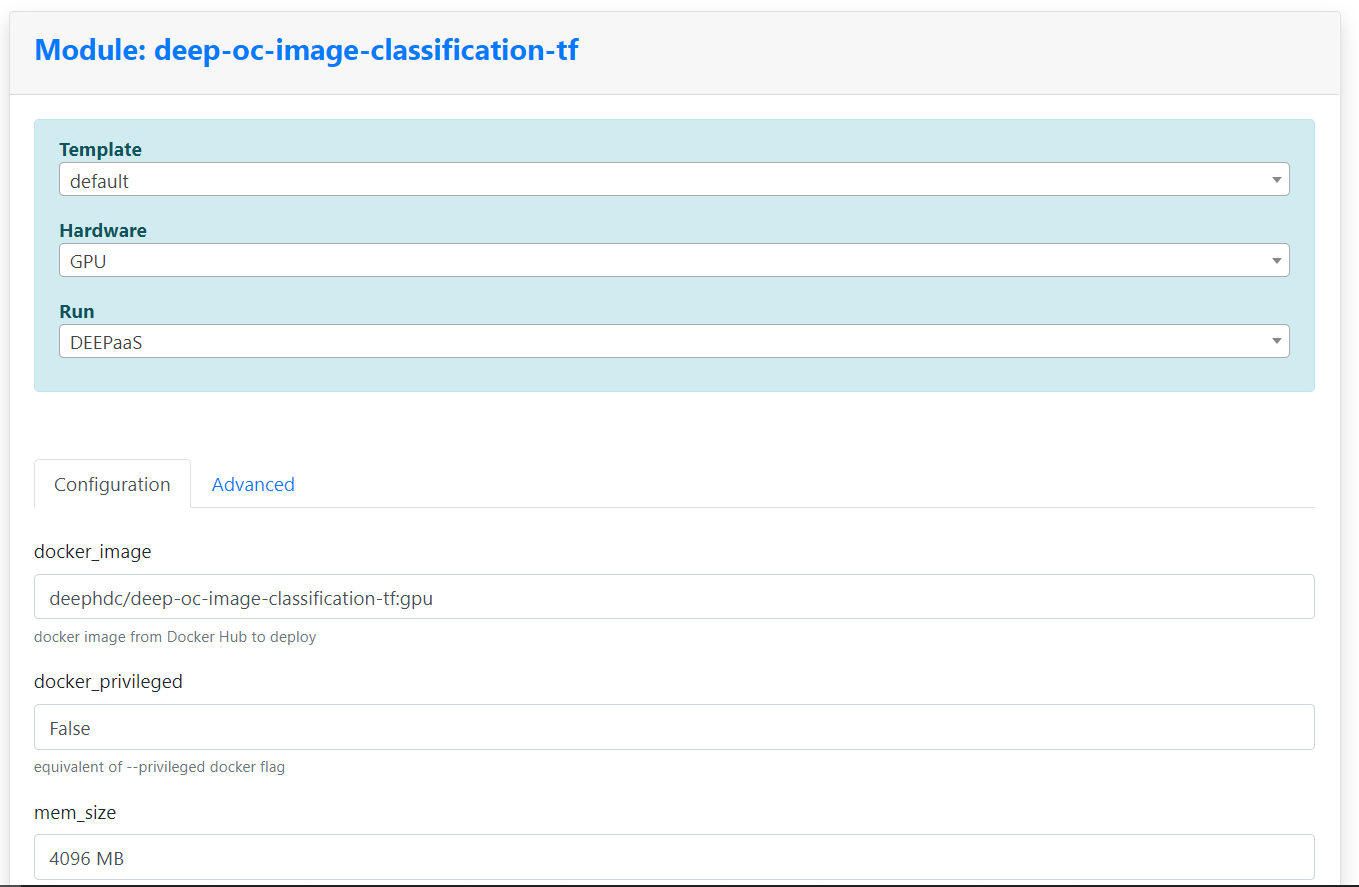
Then, we can just click on the Train module button. This will take us to a web form where we can specify the resources needed for the training: CPU or GPU, amount of memory or even the concrete site where we want to run in case we have a certain preference. We can also set the different identification parameters (ID and password) in order to access the storage system where we have our training data (NextCloud in this particular case).
Once we have submitted the form, we are redirected to a dashboard showing us the status of our deployment.
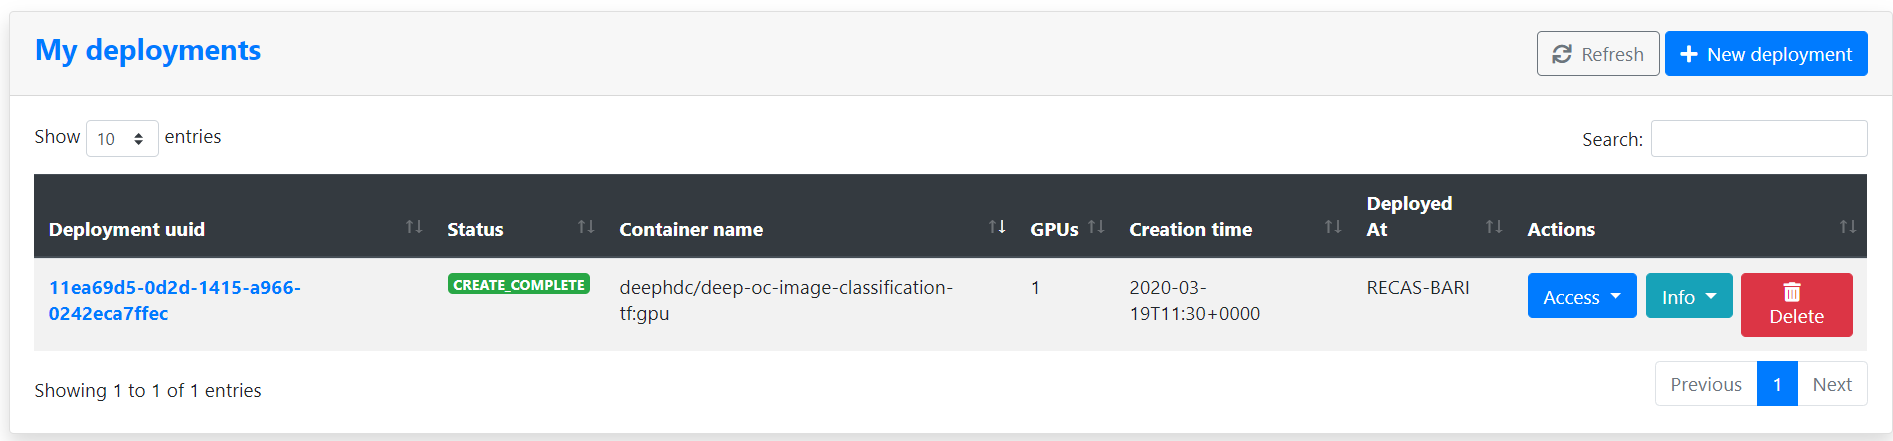
When the CREATE COMPLETE label appears, we can click on the Access menu and select DEEPaaS. This will open a new tab with a nice user interface allowing us to interact with the image classification model.
From this web user interface we can:
- Check the model metadata and details
- Retrain a certain model with our own data
- Get the list of trainings currently running
- Get the status of a training
- Cancel the training
- Make a prediction with a certain trained model

If we click on the train button we can set the training options such as number of epochs, type of architecture, batch size, whether or not to use data augmentation or early stopping, among many others. Once we are happy with the training options we can launch it just by clicking on the Execute button.
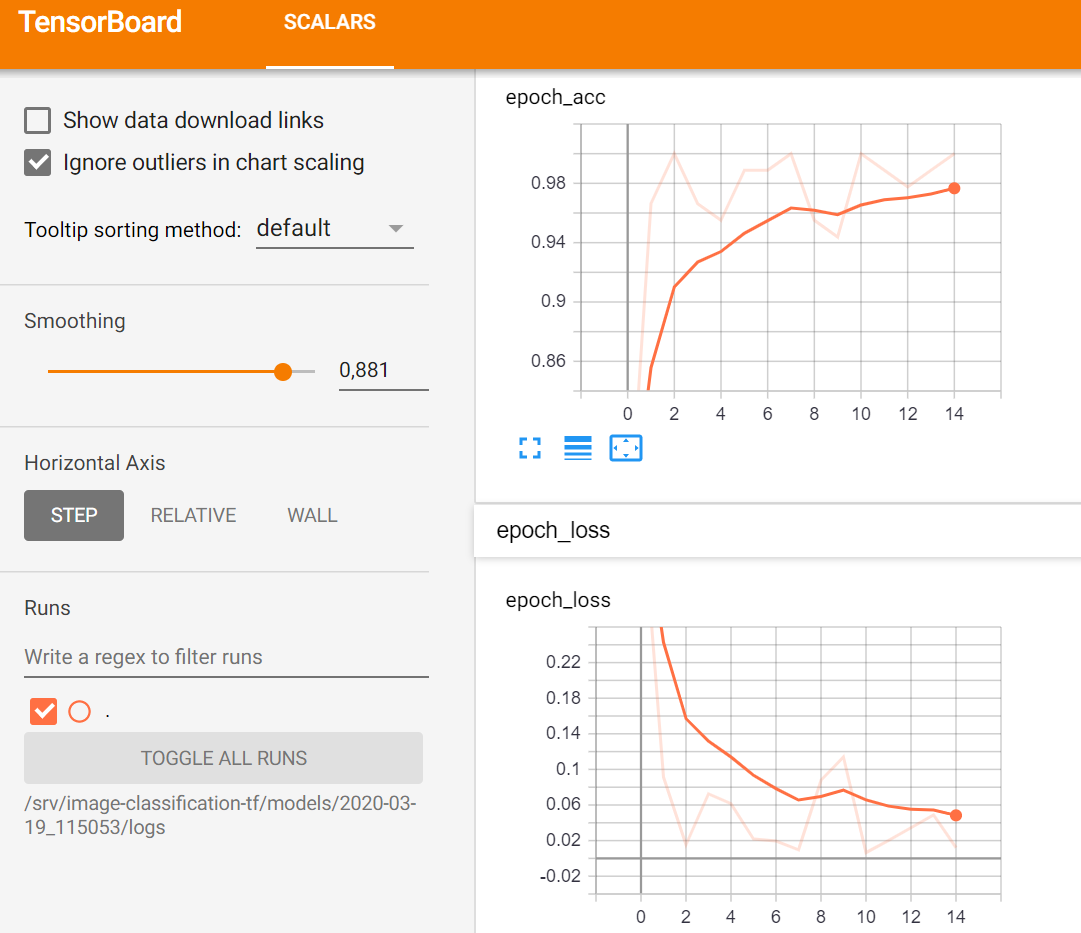
During the training, we can monitor the learning metrics (accuracy and loss) using Tensorboard by clicking on the Monitor option from the deployment Access menu in the dashboard. This will open a new tab where we will see the following information:
As mentioned earlier, the main change in this new release is the asynchronous support for training. This means that you do not have to wait for the training to finish in order to continue using the web user interface. For example you can launch a training and, while you wait for it to finish, you can immediately do predictions on a previously trained model or close the browser and come back later.
Also, you can check the status of your training or even DELETE it by using the identifier provided when the training is created (UUID). For instance, let’s see what is the current status of our image classification training from the web user interface by using the UUID:

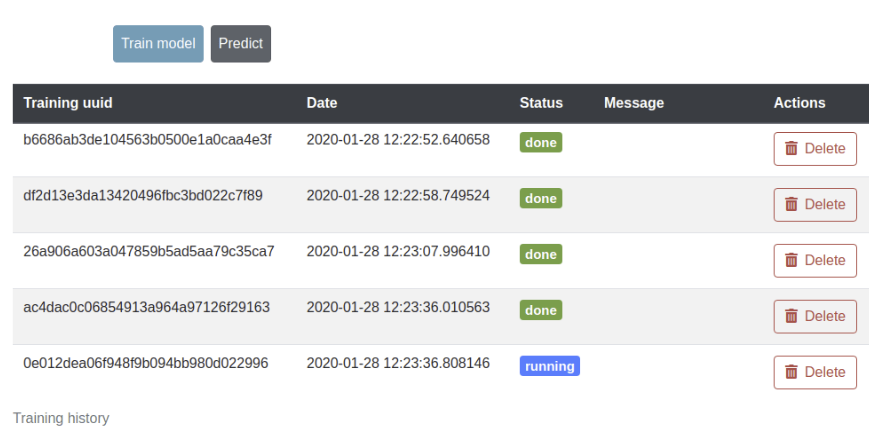
Another useful feature in this new release is the ability to store the history of all the performed trainings. This allows to monitor the status of your training directly from the training Dashboard.
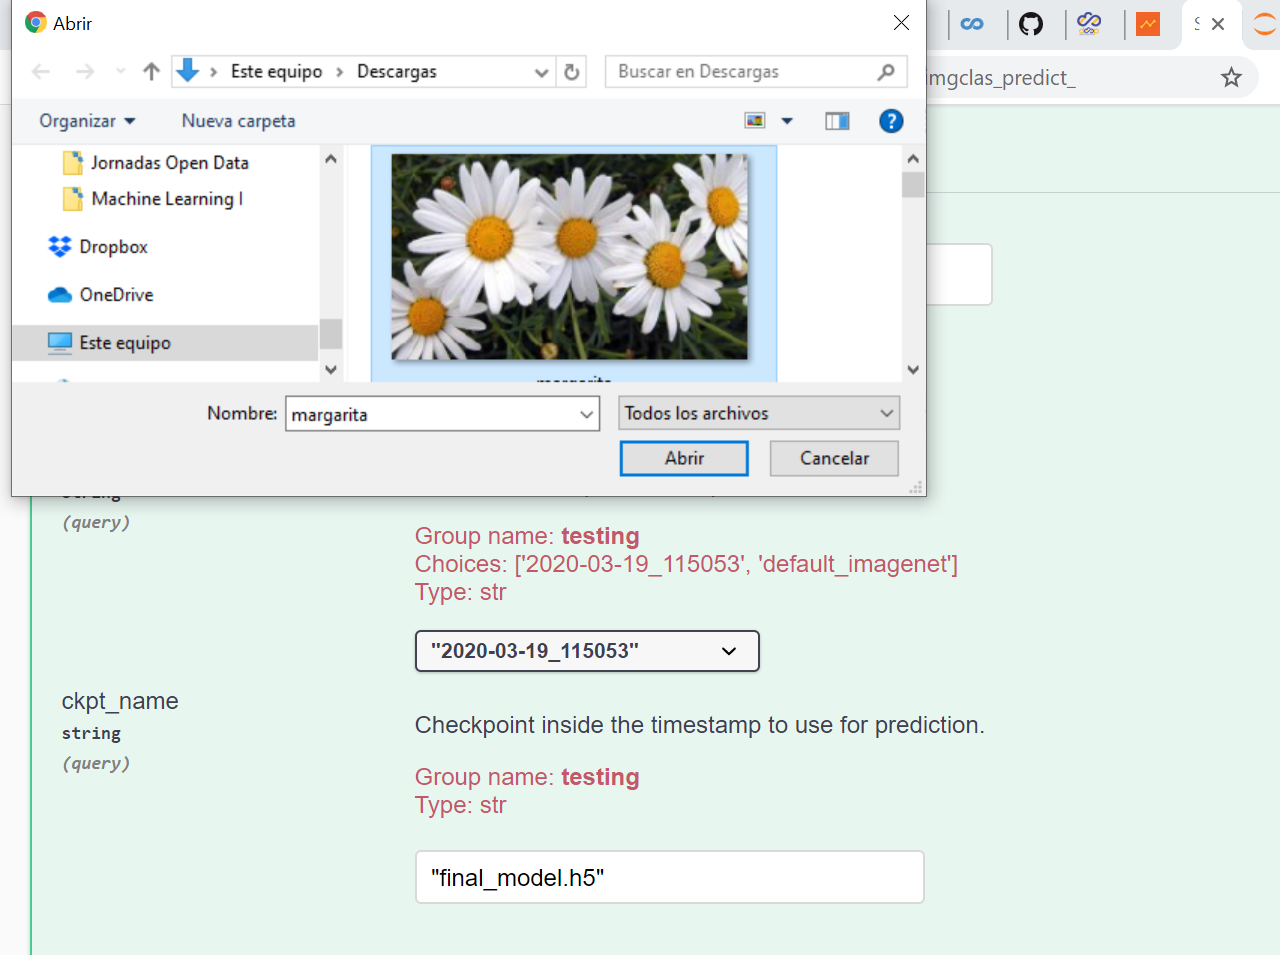
Once our training is over, we can use the web user interface to perform some prediction with our brand new model. Let’s use the image of a daisy that we found in internet:
The prediction output looks like this:
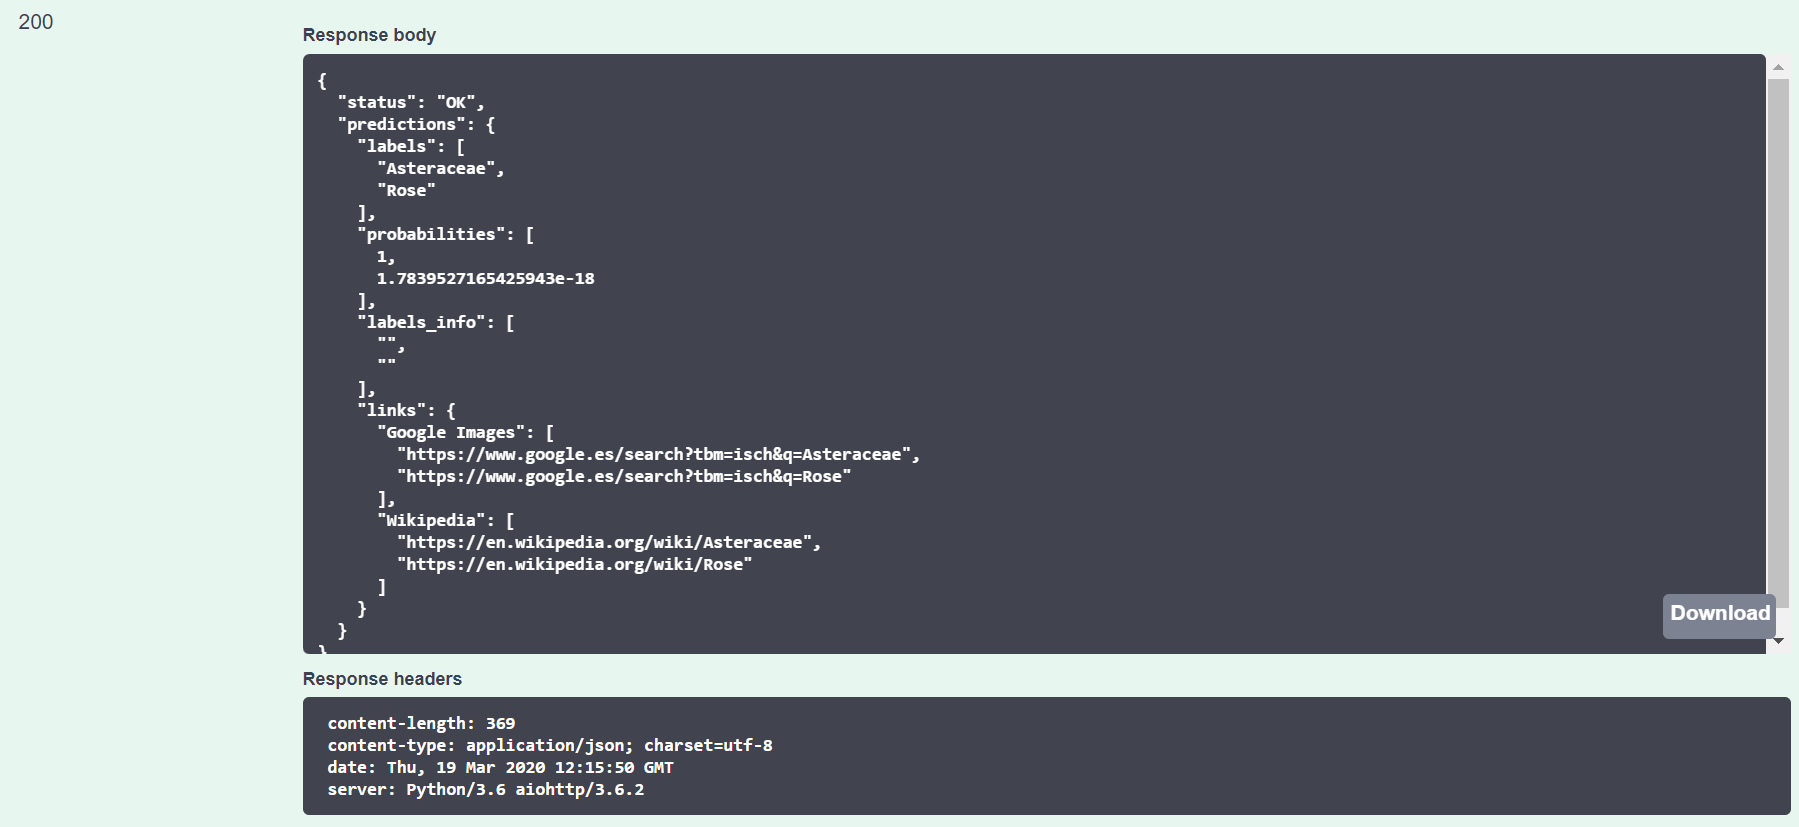
We can see that the prediction is correct! Our image is predicted as a daisy with a probability of 100%.
In this post we have seen how to browse a model from the DEEP Open Catalog, train it with our own data, monitor the training and do some prediction with our new trained model. Everything from the web browser!
Soon, another post from this saga on how to use the development docker with Jupyter. Stay tuned!